
We know the importance of applying primers to a wooden surface before painting. But what’s next? How to apply a primer and who will decide whether a coat is needed or not? And what will happen when you don’t apply primer first?
Primers make a wooden piece look nice, and produce good adhesion between paint color and surface because of adhesive properties, as well using primers we require fewer coats of the applied paint color.
We need to consider the condition of the material: bare or already painted woods, differ in the number of coats. Along with that, the types of primers either latex-based or oil-based make a difference there.
Our goal in this blog post will be to cover all the instructions you need to know to achieve a perfect end result.
Table of Contents
How do you apply primer to wood? (Steps)
Let’s take our first step with the steps to apply a primer.
The short answer is-
While priming bare wood, use a sand grit coarse to rub the surface to prepare the surface: to knock off the grains. Then, clean it up well. Apply the coat of primer and let it be cured for at least 24 hours before you either coat it prime twice or color it, ensure that if you’re using oil-based paint color the primer should be oil-based. Similarly, for latex-based paints, the primer should be latex-based.
The number of coats depends on whether you’re priming on a block of bare wood or something which has already a layer of color. As bare wood absorbs liquid into its deep grains, more coats are usually needed on bare wood.
That’s not the case with projects that have been painted in the past, usually priming them again is not really needed. Just use a wet rag to clean up the stains or dust.
Step 1 – Sand your wooden piece
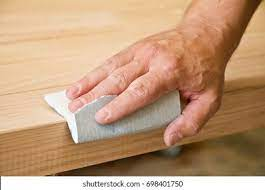
The first step is to rub your wooden piece to prepare the surface for the primer.
Use a sand grit paper of 180 coarse which is ideal for many, that will neither sand the piece too rough nor too smooth. Rub it in the direction of wood grains, but not too rough, since it may damage the surface.
The sanding part is crucial if your project is bare wood because of the active grains.
So sanding knocks down the grains, shapes the surface thoroughly balanced, and wood pallets that have knots like pinewood.
Moreover, the process of sanding can minimize the knots up to a certain extent.
If your project has been painted previously. Now you want to repaint it. In that case, it isn’t always necessary to sand the surface unless you wish to remove the current paint color.
Step 2 – Clean Your Wood
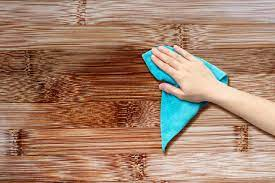
After the sanding has been done, the next step is to clean the wooden piece to help the paint adhere to the surface.
Removing dust is important if you do not want your paint color to become blotchy after a while. A hand-held vacuum or an air compressor is all that is needed to clean bare wood because there are no rough stains or something like that demands hard cleaning.
For cleaning an already painted surface, you may need to use a wet rug. Due to the chances of finding visible stains and dust particles that should be removed off.
One thing to remember here, you shouldn’t let the surface completely become wet. If it does, ensure that you let the droplets dry thoroughly before you apply a primer’s coat to get the best results possible. Alternatively, a primer would not stick to the surface.
As oil-based primers don’t adhere to moist surfaces in the way they should, their adherent ability turns lower when exposed to wet conditions. This is something that can pop up problems in the long run.
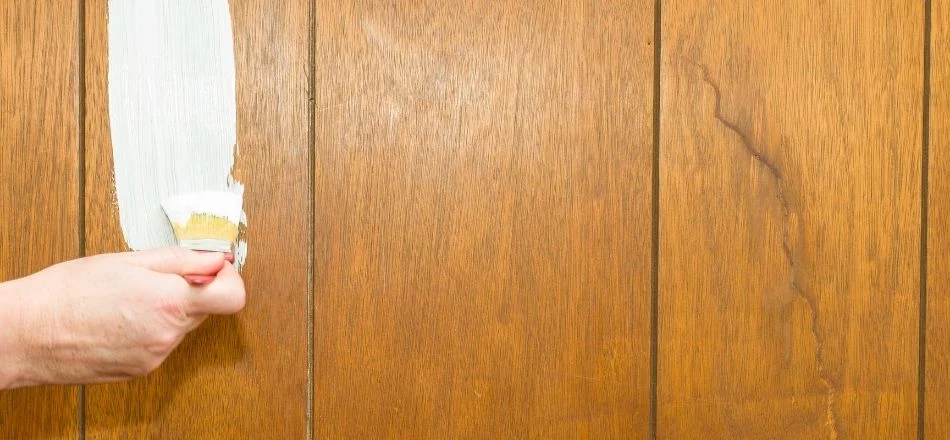
Step 3 – Apply your First Coat Of Primer
In this step considering we have prepared the surface thoroughly, we can now get into the main part which, priming the surface.
You can use a paintbrush for the job but it will take time yet yield some good results. On the other hand, using a spray gun is the faster option to cover a large surface, but may not deliver the same result as using a roller or brush.
Put your efforts into spreading the primer evenly across the surface as much as possible. Leaving too thick or too thin in certain areas will not result in satisfactory results.
Drop your tool roller or a paintbrush in your primer’s basket, don’t try to overfill it. Afterward, move your paintbrush in a straight direction either horizontally or vertically to prevent brush strokes marks and circular marks.
- If you’re going to paint color with oil-based paint, use oil-based primers.
- If you are going to chalk paint or any water-based paint, latex-based primers would be suitable for the job.
Apply enough primer to cover the wood adequately, but not so much that it results in drip marks and extra goop that takes longer to cure.
Step 4 – Deciding the number of coats
One of the crucial things during primer is to decide how many coats you should apply. If you are clueless about this matter, let’s get into the debate.
The number of coats of a primer depends a lot on the project. Such that, if this is a block of bare wood. Then, you would require at least two coats to get the surface ready for the paint color. And when it comes to repainting.
At that point, primer really isn’t needed unless you observe some missing spots or just one coat of latex-based primer would be enough to cover them up.
Moreover, priming on a darker color requires more coats, in this sense, you will want to use 2-3 coats of primer to ensure that the previous color will get covered thoroughly after the primer has been dried. That happens with the dark color tend to absorb light color effectively.
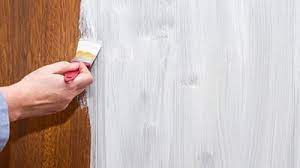
Step 5 – (Final step) Appling Paint Color
Now coming to the applying color. As mentioned earlier, you would need to follow the combination of oil-paint color with oil-based primers, while the water-based color with latex-based paint. Following this way, you will get results that will last for years.
Some other things are to be followed.
Don’t apply a color coat if the applied primer has not dried yet. It takes 24 hours.
Even if you observe the top layer has been dried but still you should give it enough time to be cured. Before you apply your second coat.