

Doweling is a woodworking technique that has been used for centuries to strengthen joints or fix stripped screws. It involves inserting small, evenly cut sticks of wood called dowels into perfectly matched holes in corresponding boards that, when glued in place, provide a strong, durable joint. Sounds easy, right? Not exactly.
In this guide, we’ll cover the steps involved in joining wood with dowels. We’ll also share some tips and tricks to make the process easier and more effective.
Table of Contents
How to Join Wood with Dowels
Choosing the Right Dowel
The first step in doweling is choosing the right size dowel for your project. Typically, the diameter of the dowel should be no more than 1/2 of the width of the board you are joining.
For example, when joining 3/4-inch width boards, a 5/16-inch or 3/8-inch dowel would be appropriate. Using a wider dowel would weaken the board, and a narrower dowel would not be strong enough to hold the joint.
Drilling the Dowel Holes
The holes to accommodate the dowels should each be drilled about 1/16 of an inch deeper than 1/2 of the length of the dowel section being used.
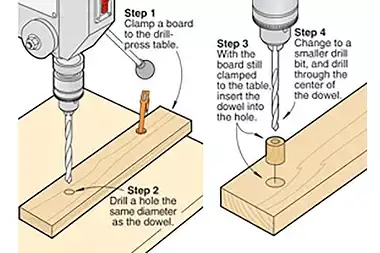
For example, dowels that are 1 1/2-inches long are commonly used, so in this case, you would drill each doweling hole to 13/16 of an inch in length.
When cutting your own dowels, chamfer the ends to make insertion into the holes easier. Also, cut a small groove down the long axis of your dowel to provide a channel for the glue and air to escape.
Using a Doweling Jig
In addition to a drill bit, your dowels and glue, you’ll find that using a doweling jig will make the doweling process much easier.
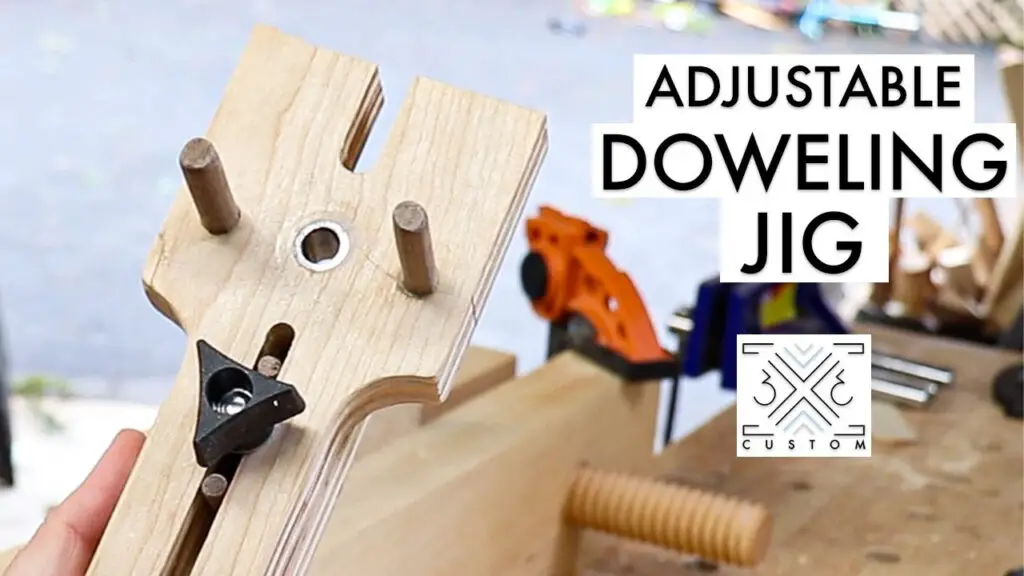
These jigs are typically metal and are designed to guide the drill bit into the stock square to the edge of the board. Your jig should include bushings to accommodate bits of varying diameters.
Drilling the First Holes
To begin doweling your joint, align the two boards to be joined into their final positions.
You’ll need to use at least two dowels for each joint, more if the joint is particularly wide. One rule of thumb is that if the board(s) are less than 6 inches wide, place one dowel 1/4 of the way across the joint, and a second dowel 1/4 of the width in from the opposite side. If the gap between the dowels exceeds 4 inches, add an additional dowel.
Using a pencil, mark the desired locations on both boards. Then, separate the boards and align the doweling jig with one of the marks on either board. Install the drill bit into your power drill or cordless drill and position the drill stop onto the bit at the desired depth.
Drill your first hole through the jig to the drill stop, then reposition the jig over the second hole and repeat. Continue until all holes on this board have been cut.
Aligning the Holes
With all of the holes in the first board drilled to the proper depth square to the board, it’s time to align the holes in the second board.
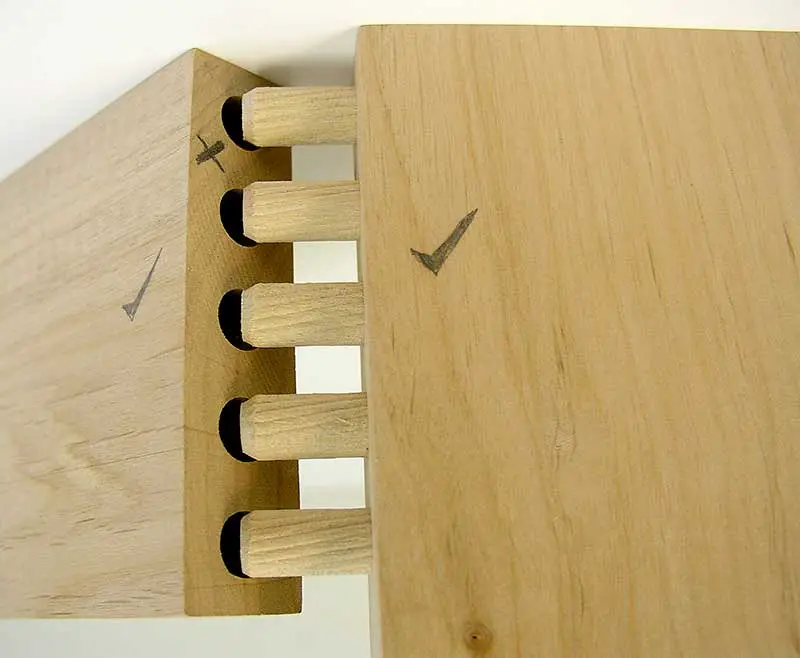
Position the doweling centers that came with your dowel kit into the holes. If you don’t have doweling centers, you can try to measure and get the proper location, but if your original holes were slightly out of place, the chances that your new hole will match are slim.
With the doweling centers positioned in the holes, align the second board into place and press it against the doweling centers. Be precise, as the doweling centers will make a
Finishing Up
Once the glue has dried, use a handsaw or flush-cut saw to cut off any protruding dowels. You can sand down any rough spots or use wood filler to cover the holes if you don’t want them to be visible. Voila! You now have a perfectly joined set of boards.
Doweling may seem intimidating at first, but it’s a simple and effective technique for creating strong joints in your woodworking projects. Plus, it’s always satisfying to know that you’ve created something that will last for years to come. And let’s not forget the added bonus of being able to brag to your friends about your doweling skills – they may even ask you to teach them!
So go ahead and give doweling a try. With a little practice, you’ll be a pro in no time. And who knows, you may even discover that it’s your new favorite woodworking technique. Happy doweling!
Are Dowel Joints Strong?
When it comes to woodworking, one of the most common types of joints used is the dowel joint. This joint involves drilling holes into two pieces of wood and inserting dowels to connect them. But the question remains: are dowel joints strong? Let’s explore this topic in more detail.
Strength of Dowel Joints
Dowel joints are generally considered to be strong joints, particularly when compared to other types of joints like butt joints or lap joints. The strength of a dowel joint depends on several factors, including:
- The size and number of dowels used
- The type and quality of wood being joined
- The accuracy of the drilling and dowel insertion process
- The type of adhesive used (if any) to secure the dowels in place
Benefits of Dowel Joints
In addition to their strength, dowel joints offer several other benefits, including:
- Aesthetic appeal: Dowel joints can add a decorative element to a woodworking project, particularly if the dowels are exposed.
- Increased stability: Dowel joints can help prevent wood from warping or twisting over time by providing additional stability.
- Ease of construction: Dowel joints are relatively easy to construct with the right tools and techniques.
Drawbacks of Dowel Joints
While dowel joints are generally considered to be strong and versatile, they do have a few drawbacks to consider:
- Alignment issues: Because dowel joints rely on precise drilling and dowel insertion, alignment can be a challenge, particularly for beginners.
- Difficulty of disassembly: Dowel joints can be difficult to disassemble if repairs or modifications are needed, as the dowels must be drilled out.
- Limited load capacity: While dowel joints are strong, they may not be suitable for heavier loads or extreme stress situations.
Comparing Dowel Joints to Other Joints
To put the strength of dowel joints into perspective, let’s compare them to other common types of joints:
- Butt joints: Dowel joints are generally stronger than butt joints, which involve joining two pieces of wood at a right angle.
- Lap joints: Lap joints can be stronger than dowel joints, particularly when used in load-bearing applications. However, lap joints are more complex to construct than dowel joints.
- Mortise and tenon joints: Mortise and tenon joints are generally stronger than dowel joints, but they are also more complex to construct and require specialized tools.