

Regardless of the type of wood you’re using for building or crafting a wood project.
Either it’s wood-engineered plywood or natural oak hardwood. Joining them together is the most essential skill you should learn- mainly how to bind them at 90 degrees is the most demanding.
Hottest Deals On Amazon You Must Know
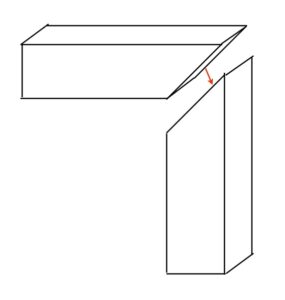
There are multiple ways to join two pieces of wood together at 90 degrees.
The easiest ways is to place them the edge to face, edge to the middle, by using these Clamps.
Or Some methods require nails and screws to fit them together and others are by using tools such as miter saws, table saws, and also there is a butt method along with many.
Table of Contents
Ways to bind two wood pieces at a 90 degree
Let’s take a look at the ways to learn how to join two pieces at a 90-degree angle without and with tools.
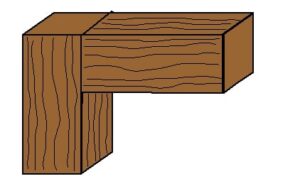
MITER JOINT- Using a miter saw
Miter means “angle”. It’s a method to join two wood pieces in the shape of L- mostly it’s used in making frames with 4 pieces that can shape a perfect square.
To proceed with this method you’re required to have a miter saw available to make precise cuts at angles of 45 degrees each. Otherwise, when doing this manually you might not make the exact cuts unless you spend time practicing.
To make a perfect joint of 90 degrees pick up two pieces of any type of wood. Using a saw cut their ends at 45 degrees and then join them together to make a perfect 90 angle. Usually, only gluing works just fine to hold the pieces, however, in order to even strengthen the joint you can insert some screws.
Remember that, as the name applies, Angles; it’s not always necessary to cut ends at 45 to make 90. Depending upon your choice and the wood shape you have, you can cut one end at 20 degrees and another end at 70 degrees to get the desired results.
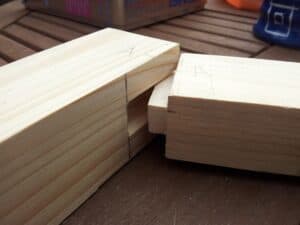
THE BUTT JOINT- Using screws and Glue
One of the easier methods to join two pieces of squared wood is the Butt joint. Using only screws and glue you can get a tightened join to last longer- The only downside to following this method is, it requires a square piece of wood.
Take up two pieces of wood, wood type does not matter as long as they are not very thin to drill a screw into them. Without any cutting or using any saw, simply place one piece to another horizontally after gluing the counter spots of each.
To boost joint strength, insert screws long enough to cross the first piece of wood and end in the second.
In this way, you get a nice 90-degree joint. This method mostly works in baseboards or installing trims.
THE LAP JOINT- Using a table with dado blades
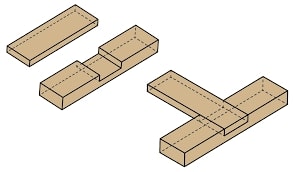
A lap joint is also among the types used to join pieces vertically. Primarily when joining edge-to-middle pieces these offer significant strength. You certainly have to use a table saw with dado blades to make wider straight cuts.
In this method, you need to half-notch one piece from an end and notch the second piece from the spot to be fastened. Glue the surface and overlap them.
At that point, the strength is stronger than many types of joints, however, it can be even greater by installing some screws- mostly when framing a larger box-like constructing a home’s model. Woodworkers tend to use this method.
Since the joint is stronger, it requires some expertise to perform precise cuts otherwise two pieces would not perfectly overlap. Either they don’t fit and lose.
The lap joint method is perfect for DIYers to make a 90-degree joint who have a table saw with a dado blade installed.
Simply cut the spots on either side of a wood place. Use a pencil to mark out the spots to get the more precise cut.
THE MORTISE AND TENON JOINT
These joints also offer a strong 9-degree joint. You can see these joins in wooden chairs or most likely any wood furniture attachable parts are joined by this method.
As the name suggests Mortise and Tenon, one piece of wood creates a cavity for another to fit in there to make a joint.
Mortise and Tenon joints are not recommended for beginners. It’s hard to grind a perfect shape- required some practice to hit the perfection level.
Once it’s done, you don’t need any glue or even screws to make the joint stronger, as it already is.
If your main purpose is to make a 90-degree join for building a wood chair or something like where multiple attachable parts need to be summed together.
This is definitely one of the best ways you can try- only if you have some experience with cutting tools.
THE DOWEL JOINT- Without showing nails or screws
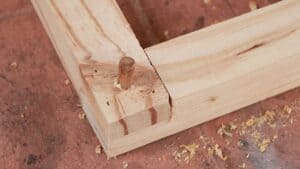
The type of join is mostly used where nails and screws are not desirable- don’t look good such as cabinets, bookcases, a desk, and other kinds of wood furniture.
The Dowell join is not much different than Mortise and Tenon except that in there a wood piece used as a socket to project to two pieces by drilling holes to notched spots (mostly).
With this method, you replace screws with a small piece of wood without compromising strength.
The small wood block (socket) can be round, square, or triangle, depending upon the cavity. Round blocks are ideal since it is easier to create a rounded hole with a drilling machine.
Surely the level of expertise should be above intermediate if you’re following this method.
It’s recommended to apply this method on notched-woods as it is supposed to be an updated form of Mortise and Tenon to strengthen the join.
However, you can apply this method with all the above listed if you want to avoid using screws for some reason.