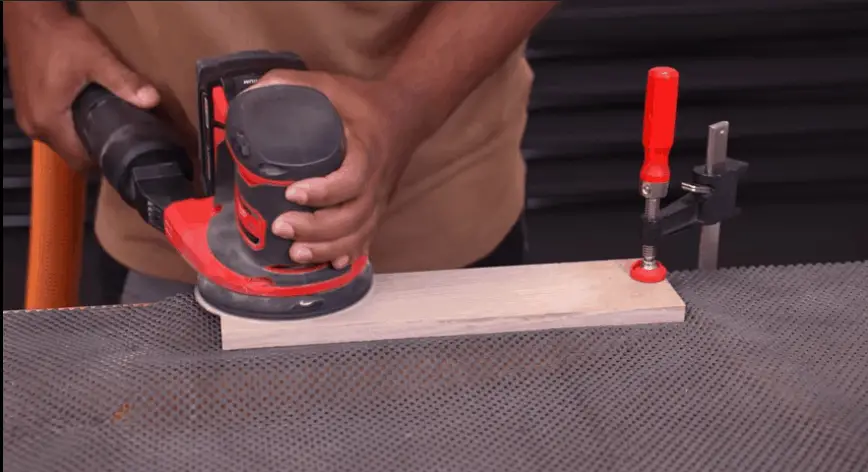
If you’re diving into the world of woodworking or home improvement, you’ve likely encountered the age-old debate: should I sand after priming wood?
It’s a question that’s sparked countless discussions among DIY enthusiasts and professionals alike.
While there isn’t a one-size-fits-all answer, I’m here to shed some light on the matter and provide you with five compelling reasons why sanding after priming wood might just be the right move.
Table of Contents
Key Points: Should I Sand After Priming Wood?
1. Smoothness Matters: Sanding after priming wood helps create a smooth surface, eliminating imperfections and brush marks. This sets the stage for a flawless paint finish that looks professional.
2. Enhanced Adhesion: Sanding provides a slightly roughened surface that boosts paint adhesion. This extra grip ensures your paint job remains intact and resists peeling, even in high-traffic or outdoor areas.
3. Defeat Grain Raise: For woods that tend to experience grain raise, sanding after priming helps eliminate the bumpy texture caused by swollen wood fibers. This results in a polished, even surface.
4. Artistic Freedom: Sanding lets you play with color and texture. You can strategically sand areas to create depth and character, giving your project a unique and artistic touch.
5. Efficiency: A smooth, well-sanded surface reduces the need for multiple coats of paint, saving you time and effort. Plus, it minimizes the likelihood of future touch-ups or refinishing.
6. Protection from Stains: Certain wood types can cause stains and bleed-through even after priming. Sanding after priming acts as an extra barrier, preventing these colorants from ruining your paint job.
7. Seamless Repairs: Sanding helps level out patched areas, ensuring repairs blend seamlessly with the rest of the surface. This creates a uniform canvas for your paint application.
8. Professional Touch: Sanding after priming wood is a technique used by professionals to achieve outstanding results. It’s a step that elevates the quality of your work from good to exceptional.
9. Longevity and Durability: A well-sanded surface is less prone to chipping, cracking, and peeling, contributing to the longevity and durability of your woodworking projects.
10. Mindful Experience: Sanding can be a therapeutic and mindful step in your woodworking process. It allows you to connect with your project on a deeper level and focus on the finer details.
11. Personal Satisfaction: Giving your project the attention it deserves through sanding adds a layer of personal pride and satisfaction to your woodworking journey.
12 Reasons: Why you Should sand after priming wood?
1. Smoother Surfaces, Better Results
Sanding after priming wood is like adding that final touch of finesse to your masterpiece.
Even if you’ve meticulously applied primer, there’s a chance you might end up with a few uneven spots or brush marks.
That’s where sanding comes in as your secret weapon. A gentle sanding session with fine-grit sandpaper helps smoothen out any imperfections, leaving you with a surface that’s ready to absorb paint like a sponge.
The result? A professional-looking finish that’s sure to impress.
2. Adhesion Amplified
Ever wondered why paint sometimes peels off or looks uneven?
It’s often due to poor adhesion. Sanding after priming wood boosts adhesion by creating a slightly roughened surface for the paint to grip onto.
Think of it as providing a textured playground for your paint to bond with.
This extra grip ensures your paint job stays put and maintains its integrity over time, especially in high-traffic areas or outdoor projects exposed to the elements.
3. Say Goodbye to Grain Raise
If you’re working with certain types of wood, you might be familiar with the pesky phenomenon known as grain raise.
This occurs when wood fibers swell after primer application, creating a bumpy texture that’s anything but desirable. By giving the primed surface a light sanding, you can nip grain raise in the bud.
Sanding smooths out these raised fibers, leaving you with a surface as polished as your woodworking skills.
4. The Art of Blend and Blur
Let’s talk about the artistic aspect of your project.
Maybe you’re going for that vintage distressed look or aiming for a seamless color transition between different sections.
Sanding after priming wood allows you to play with nuances of color and texture.
You can strategically sand certain areas to reveal underlying layers, creating a sense of depth and character.
It’s like being an artist with a canvas, and sandpaper is your brush.
5. Time and Effort, Invested Wisely
You’ve put in the effort to prime your wood, so why not maximize the impact of your hard work?
Sanding after priming wood may seem like an additional step, but it’s a shortcut to achieving professional-level results without cutting corners.
Remember, the key is finesse, not force. A gentle sanding session doesn’t take much time, and the payoff is well worth it in the form of a stunning finish that stands the test of time.
6. Say No to Stains and Bleed-Through
Some wood types, particularly those with high tannin content like oak or cedar, are notorious for causing stains and bleed-through when painted.
Even a well-applied primer might not fully block these colorants from seeping through.
Here’s where sanding after priming wood steps in as your troubleshooter.
By sanding the primed surface, you create an additional barrier that helps prevent those unsightly stains, giving you a flawless finish that’s free from unwanted surprises.
7. Patch Perfection
Imagine you’ve patched up knots, dings, or imperfections in your wood with a filler or putty.
While priming helps seal these repairs, it doesn’t always create a seamless surface.
That’s where sanding works its magic.
Sanding after priming wood helps level out patched areas, ensuring they blend seamlessly with the rest of the surface.
Your repairs become virtually invisible, and you’re left with a smooth, uniform canvas ready for your artistic touch.
8. Time is of the Essence
While sanding after priming might seem like an extra step, it can actually save you time in the long run.
A smooth, well-prepped surface allows paint to glide on effortlessly, reducing the need for multiple coats.
This means less time waiting for paint to dry and more time enjoying your finished project.
Plus, when your paint adheres better, you’ll likely need fewer touch-ups down the road, saving you both time and frustration.
9. The Professional Touch
Whether you’re a seasoned pro or a DIY enthusiast, achieving professional-looking results is always the goal.
Sanding after priming wood is a technique that many professionals swear by to take their projects to the next level. It’s that extra step that elevates your work from good to outstanding.
So, if you’re aiming for results that turn heads and garner compliments, don’t skip the sanding—it’s the secret to that polished, refined finish.
10. Longevity and Durability
Woodworking projects, especially those exposed to wear and tear, need to withstand the test of time. Sanding after priming wood not only enhances the aesthetic appeal but also contributes to the longevity and durability of your creation.
A well-prepped surface is less prone to chipping, cracking, or peeling, ensuring your masterpiece remains stunning for years to come.
11. A Mindful Meditative Step
Sanding might sound like a mundane task, but it can be surprisingly therapeutic.
It’s a moment to slow down, focus on the details, and connect with your project on a deeper level.
As you run your hand over the smooth surface, you’re not just perfecting the wood—you’re also indulging in a mindful, almost meditative, experience that’s as rewarding as the end result itself.
12. Your Personal Stamp
Lastly, sanding after priming wood allows you to put your personal stamp on your projects.
It’s a chance to fine-tune, refine, and customize every inch of your creation.
By paying attention to the smallest details, you’re infusing your work with a level of care and dedication that sets it apart.
The pride that comes from knowing you’ve given your all to a project is immeasurable and adds an extra layer of satisfaction to your woodworking journey.
8 Tips for Sanding Before After Primer
1. Choose the Right Sandpaper
When it comes to sanding after priming wood, the right sandpaper can make all the difference.
Opt for a fine-grit sandpaper, such as 220-grit or higher.
This grit is gentle enough to smooth the surface without causing excessive abrasion.
If you’re dealing with rough patches or imperfections, you can start with a slightly coarser grit and gradually move to finer grits for a polished finish.
2. Light and Even Pressure
Remember, you’re aiming to finesse the surface, not strip it down.
Apply light and even pressure as you sand. Let the sandpaper do the work, and avoid pressing too hard.
This minimizes the risk of over-sanding or creating uneven spots. Keep your strokes consistent and go with the grain of the wood for the best results.
3. Mind the Dust
Sanding creates a fair amount of dust, which can be a nuisance and potentially harmful to your health if inhaled.
To keep the workspace clean and safe, consider using a dust mask, safety goggles, and a vacuum or dust collection system.
It’s a small investment that pays off in terms of both cleanliness and your well-being.
4. Test a Hidden Area
Before you launch into sanding the entire primed surface, it’s a good idea to test your sanding technique on a small, inconspicuous area.
This helps you gauge the effect of sanding on your particular wood and primer combination.
It’s better to make any adjustments early on rather than risk damaging the visible parts of your project.
5. Wipe It Down
Once you’ve finished sanding, wipe down the surface with a clean, damp cloth to remove any residual dust.
This ensures that the primed wood is clean and ready to receive the paint. A clean surface promotes better adhesion and a flawless finish.
6. Patience is Key
Sanding after priming wood is a step that requires patience and attention to detail.
Take your time, and don’t rush through it.
Remember, the goal is to achieve a smooth and polished surface that sets the stage for your paint job.
The extra time you invest in sanding will undoubtedly reflect in the final result.
7. Evaluate and Adjust
After you’ve completed the sanding process, take a step back and evaluate the surface.
Look for any remaining imperfections, uneven spots, or areas that might need additional attention.
If necessary, you can perform a light touch-up sanding on these specific areas before proceeding to the painting stage.
8. Enjoy the Rewards
Once you’ve sanded after priming wood and painted your project, take a moment to appreciate the results of your efforts.
The smooth, professional finish you’ve achieved is a testament to your skill and dedication.
Whether it’s a furniture piece, cabinetry, or a decorative item, your project will stand out as a true work of craftsmanship.


